Latest Updates
How to Add New IP Address from WHM
How to Add New IP Address from WHM Adding a new IP address in WHM allows server administrators to assign dedicated IPs to hosting accounts, configure private nameservers, and manage server resources more efficiently.…
How to Add New IP Address from WHM
Adding a new IP address in WHM allows server administrators to assign dedicated IPs to hosting accounts, configure private nameservers, and manage server resources more efficiently. Before adding the IP address in WHM, ensure that the IP has already been routed to your server by your hosting provider or data center.
Step 1: Log in to WHM
Log in to your WHM account using root credentials.
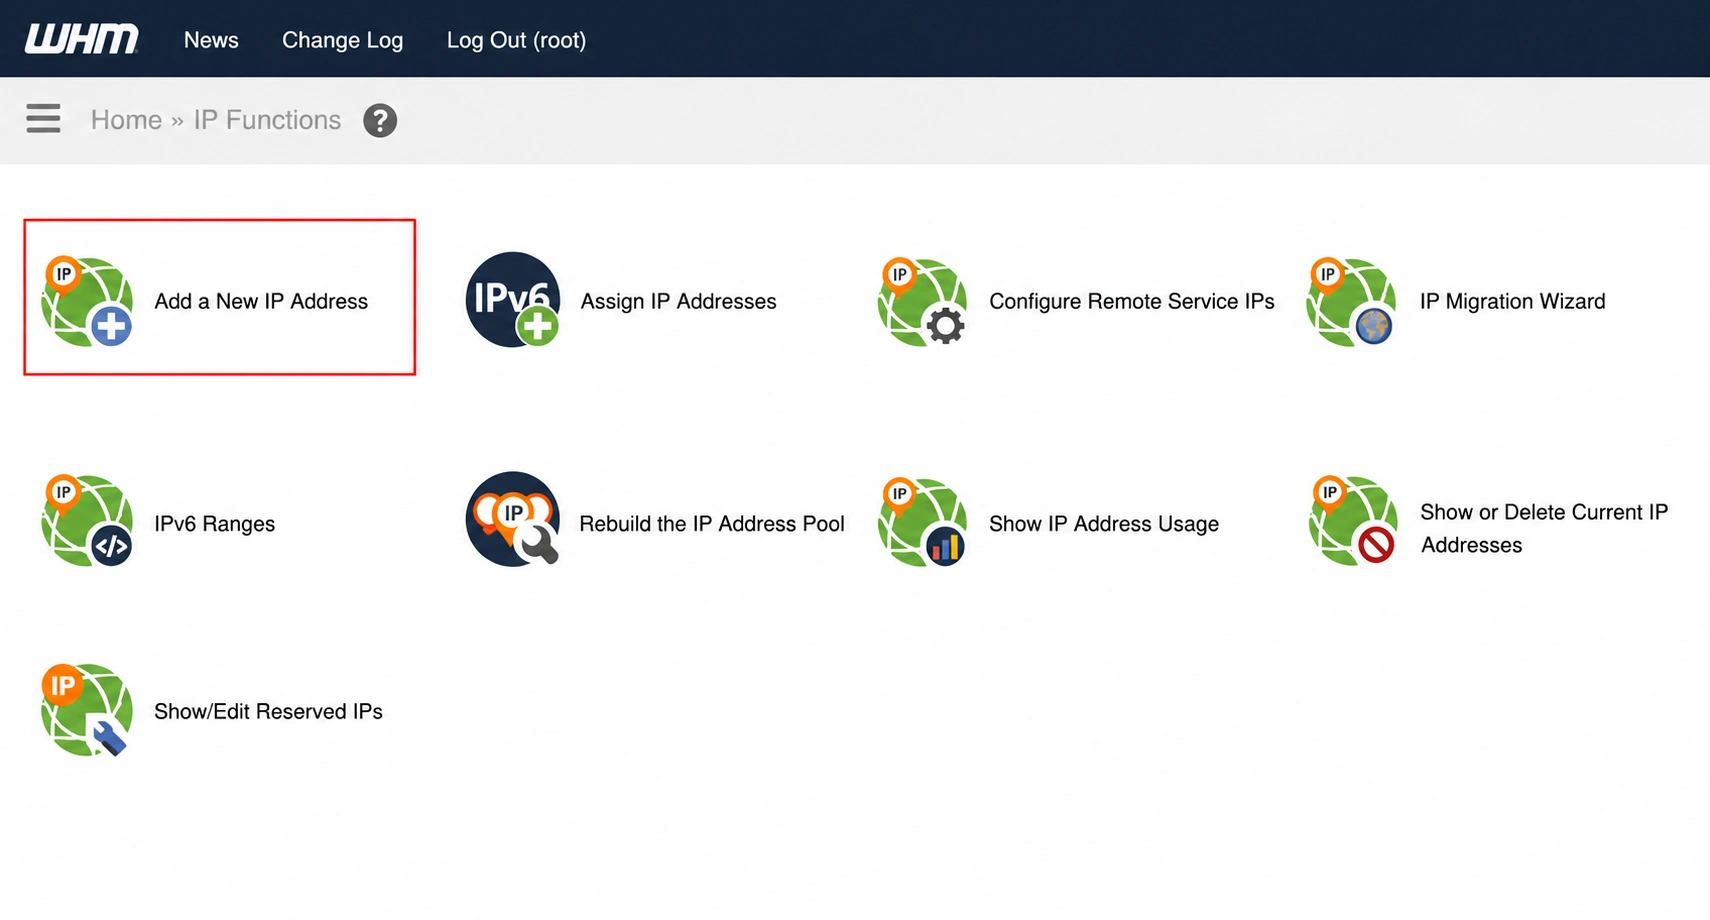
Step 2: Open IP Functions
From the left-side menu, navigate to: IP Functions

Step 3: Click on Add a New IP Address
Under IP Functions, select:
Add a New IP Address
A form will appear where you can enter the new IP details.
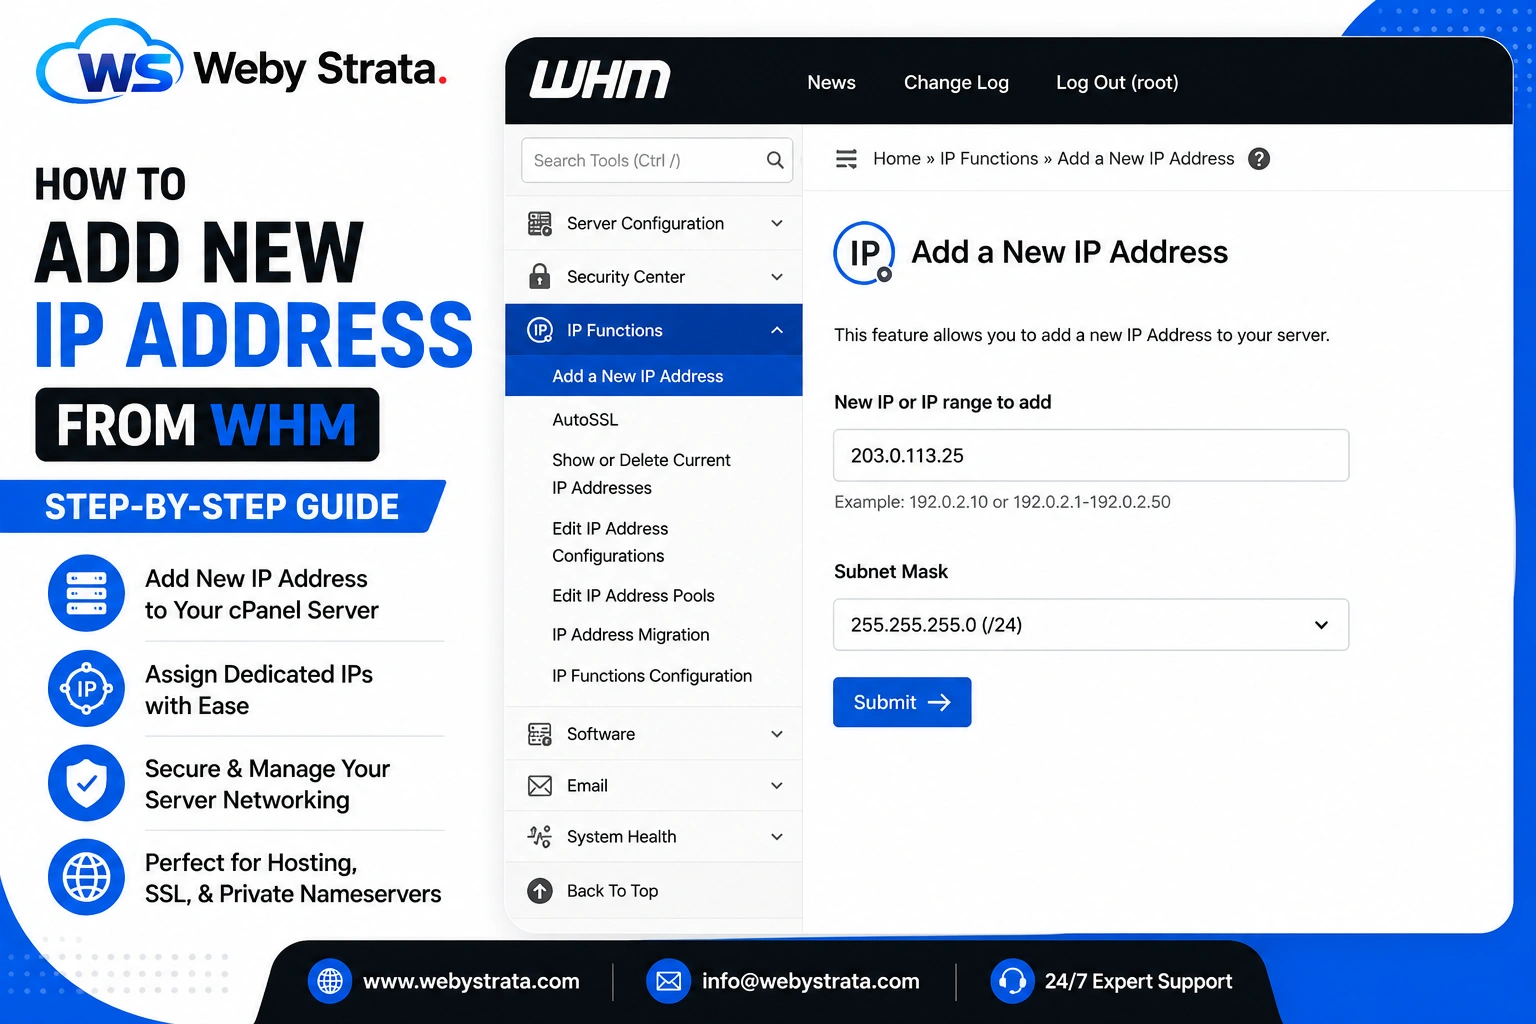
Step 4: Enter the New IP Address
In the New IP or IP range to add field, enter the IP address you want to add to the server.
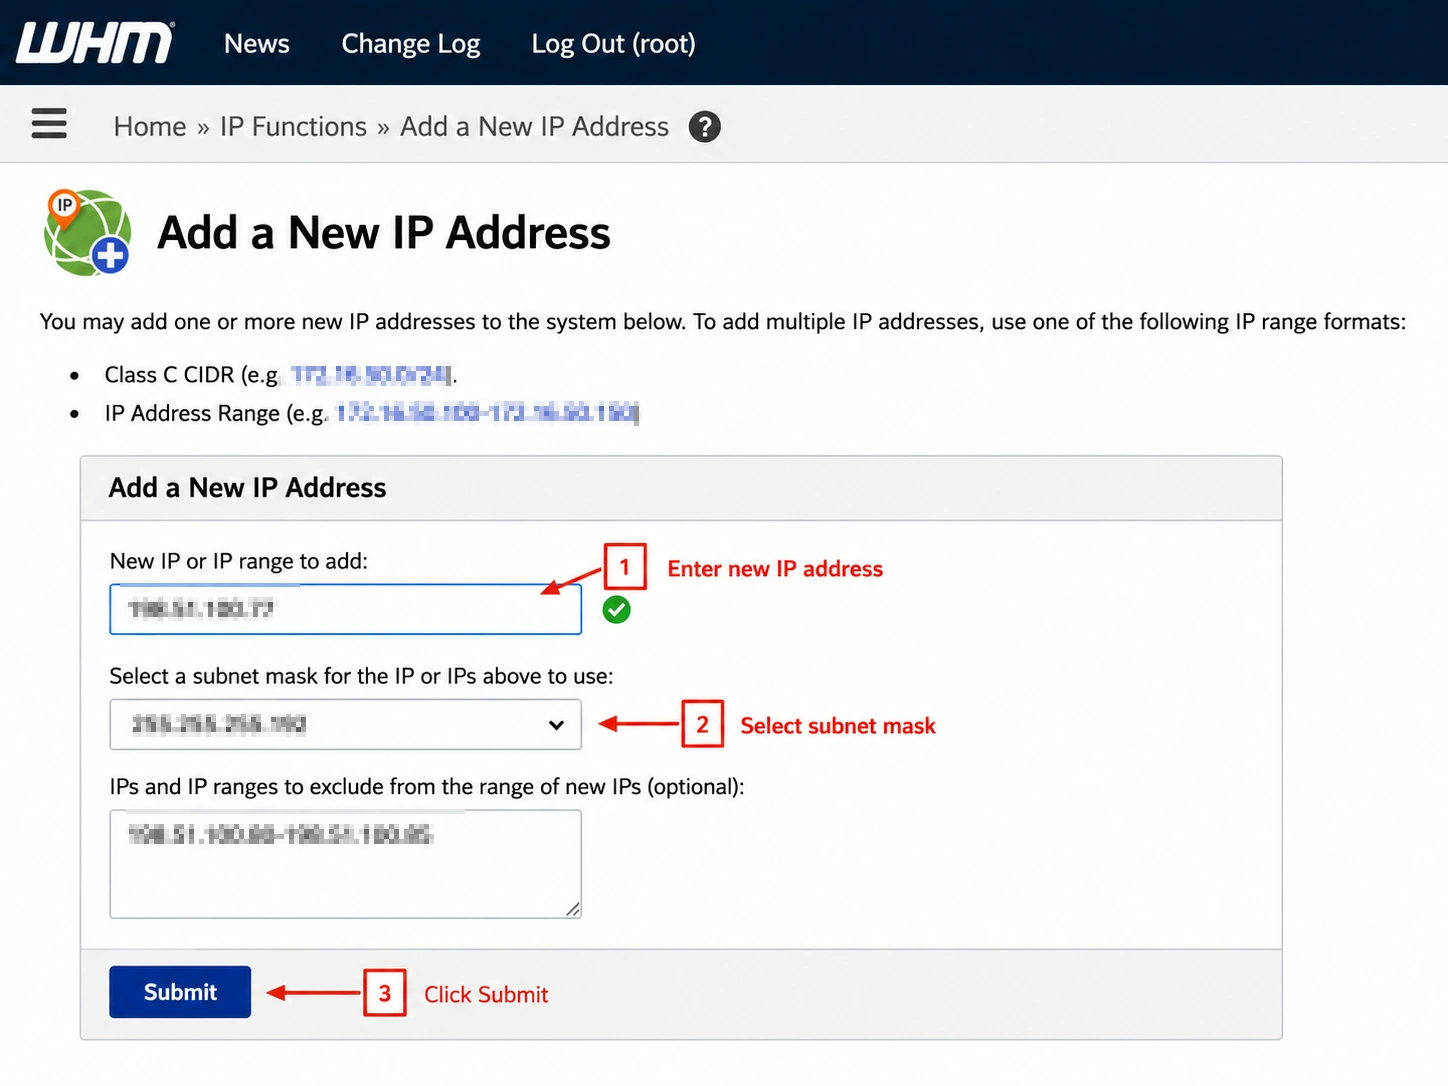
Step 5: Select the Subnet Mask
Choose the correct subnet mask from the dropdown menu.
Important: Selecting an incorrect subnet mask may cause network connectivity issues. If you are unsure about the subnet mask, contact your hosting provider before proceeding.
Step 6: Click Submit
After entering the IP address and subnet mask, click: Submit
WHM will process the request and add the IP address to your server.
Step 7: Verify the Added IP
To confirm the IP has been added successfully, go to:
IP Functions → Show or Delete Current IP Addresses
The newly added IP address should now appear in the list.
Conclusion
Adding a new IP address in WHM is a simple process that helps server administrators manage dedicated IP assignments, private nameservers, SSL configurations, and hosting accounts efficiently. Always verify that the IP is routed correctly and use the appropriate subnet mask before adding it to the server.
Originally published on WebyStrata.com Blog.
Related Articles