cPanel
How to Update WordPress Memory Limit from cPanel
How to Update WordPress Memory Limit from cPanel WordPress is one of the most powerful and widely used content management systems available today. However, as your website grows with additional plugins, themes, media files,…

How to Update WordPress Memory Limit from cPanel
WordPress is one of the most powerful and widely used content management systems available today. However, as your website grows with additional plugins, themes, media files, and visitors, it may begin consuming more server resources. One common issue WordPress users encounter is the “Allowed memory size exhausted” error.
This error indicates that WordPress has reached the maximum amount of PHP memory allocated by your hosting environment. When this happens, certain website functions may stop working, plugins may fail to load, updates may not complete successfully, and visitors may experience slow page loading times.
Fortunately, if your website is hosted on a cPanel server, increasing the WordPress memory limit is a straightforward process. By making a simple modification to your WordPress configuration file, you can provide your website with additional memory and improve its performance.
In this guide, we’ll explain what the WordPress memory limit is, why it matters, and how to Update WordPress memory limit from cPanel.
What is the WordPress Memory Limit?
The WordPress memory limit determines the maximum amount of memory that PHP scripts can consume while executing WordPress processes. Every WordPress website relies on PHP to run its themes, plugins, database interactions, and core functionalities.
By default, many hosting providers set a conservative memory limit to prevent a single website from consuming excessive server resources. However, modern WordPress websites often require more memory, especially if they use:
- WooCommerce
- Page builders
- Membership plugins
- Backup tools
- Security plugins
- Large media libraries
- Custom themes
When the allocated memory becomes insufficient, WordPress displays memory-related errors and performance issues. Now let’s see the Steps that how to Update WordPress memory limit from cPanel.
How to Update WordPress Memory Limit from cPanel
Follow the steps below to Update WordPress memory limit from cPanel .
Step 1: Login to cPanel from WebyStrata Client Area
First, visit the WebyStrata website and log in to your client area account using your registered email address and password.
official Website www.webystrata.com
After logging in:
- Go to Services
- Click on My Services
- Select your active hosting service
- Click on Login to cPanel

Step 2: Open File Manager
Locate the Files section within cPanel.
Click on File Manager to access your website files.
File Manager allows you to edit website files directly without using FTP software.

Step 3: Navigate to Your WordPress Installation Directory
Open the directory where WordPress is installed.
Common locations include:
public_htmlfor your primary domain then click on folder wp in which all the files will stored in it
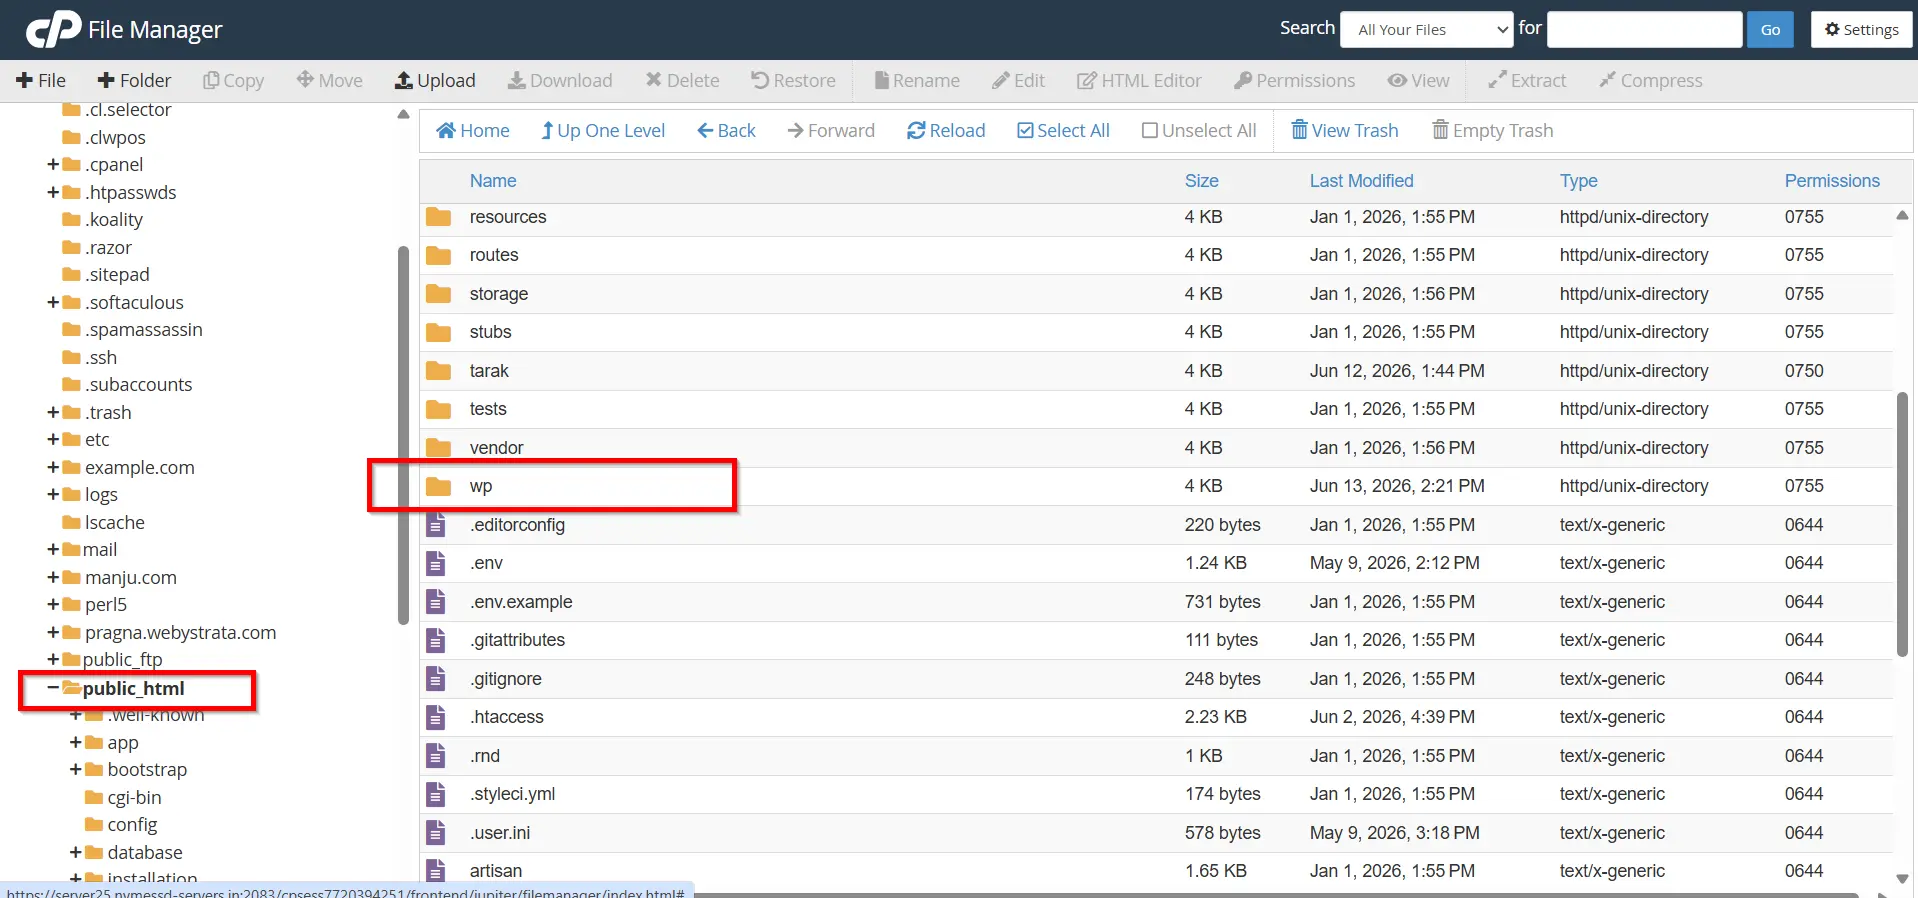
- locate the file named :
wp-config.php
This file contains important WordPress configuration settings.
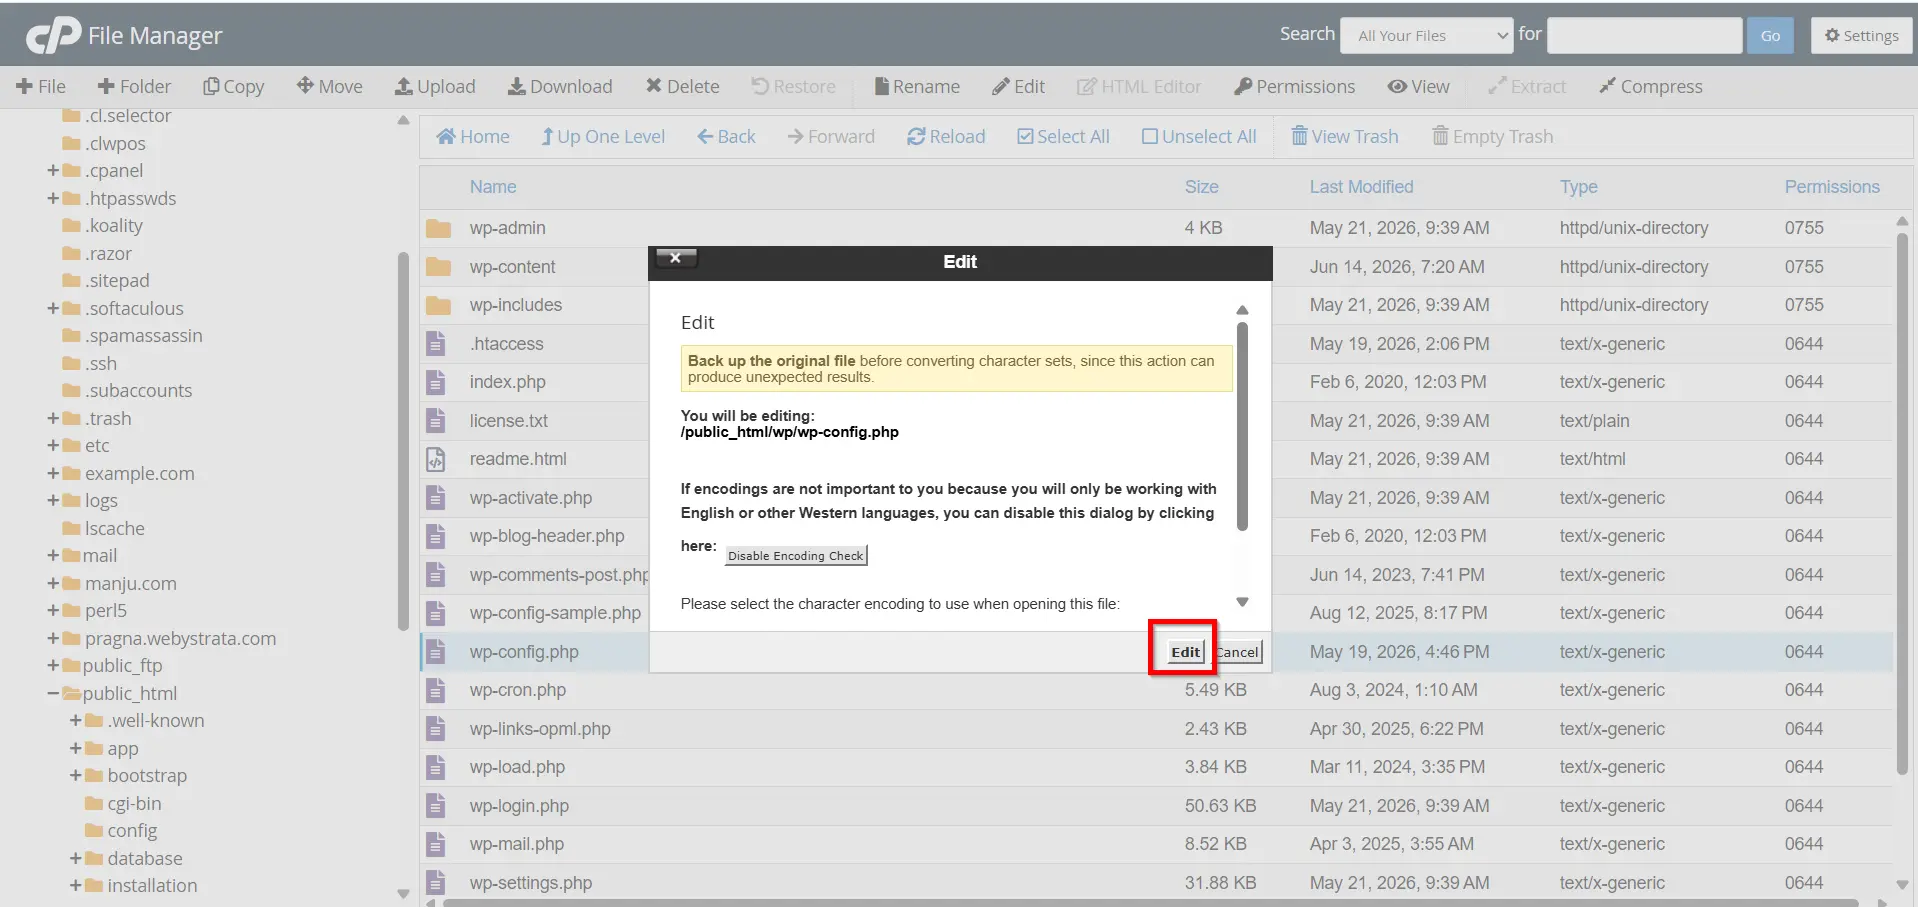
Step 4: Edit the wp-config.php File
Select the wp-config.php file.
Click Edit from the File Manager toolbar.
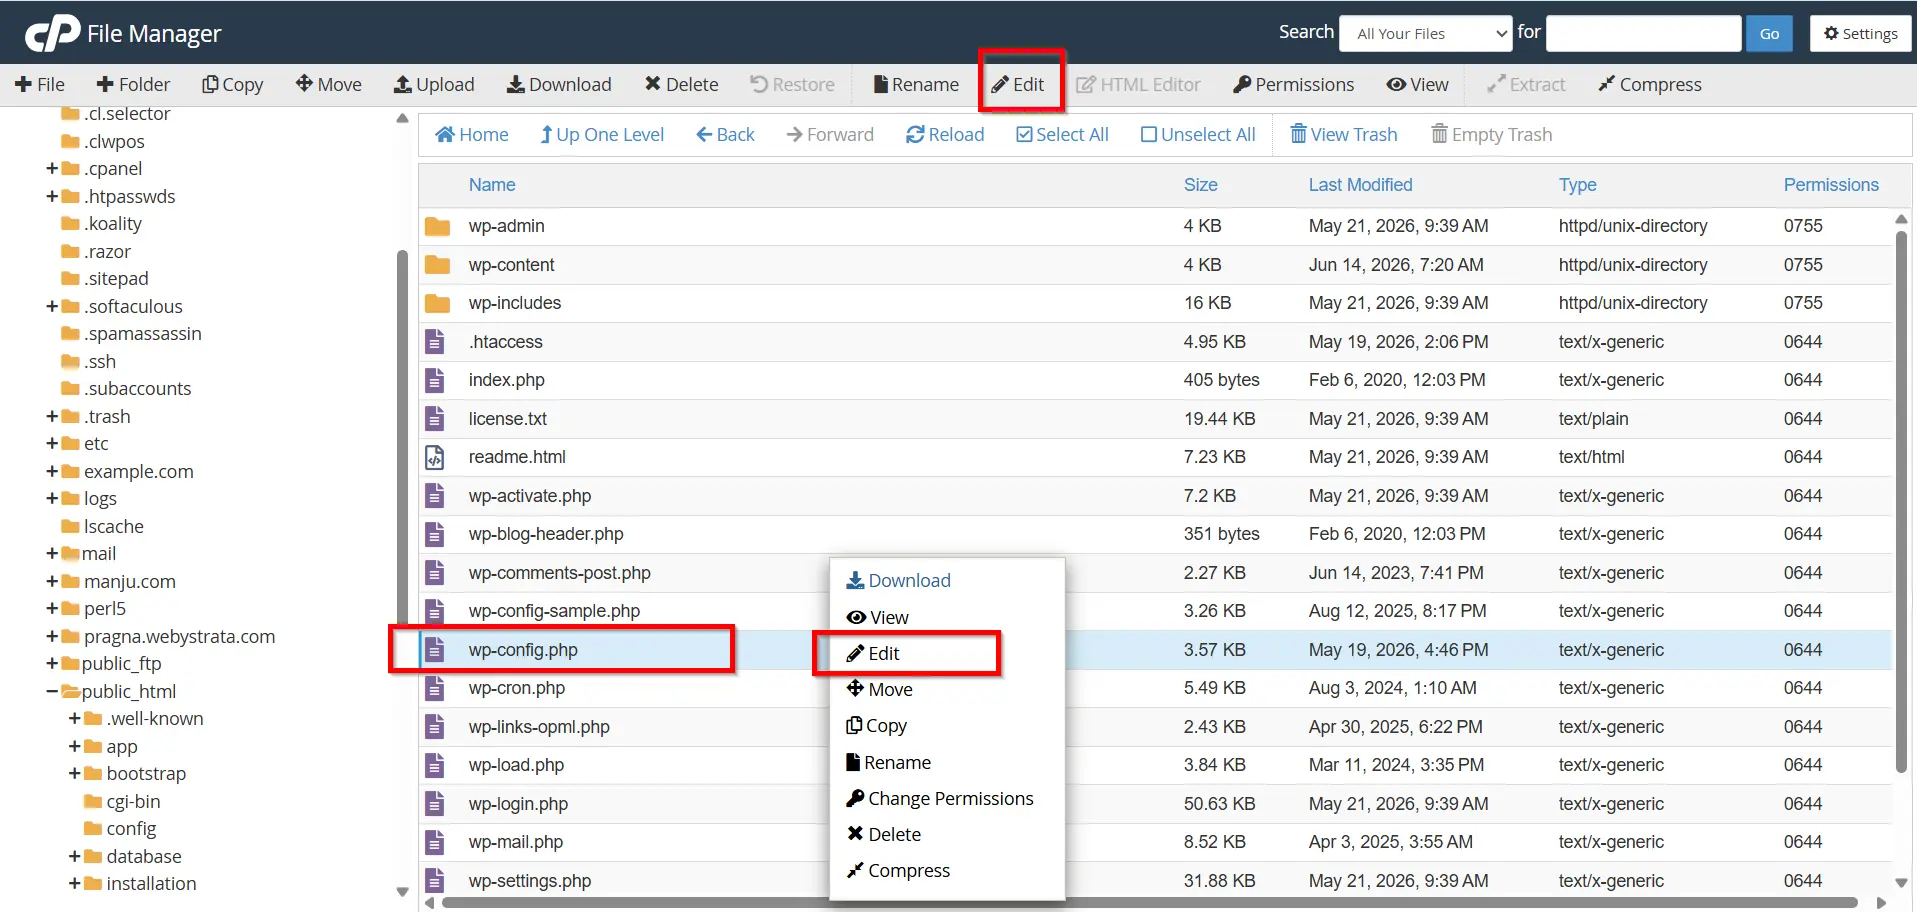
A popup may appear asking you to confirm the file encoding. Simply click Edit again to proceed.
The file editor will open and display the contents of the configuration file.
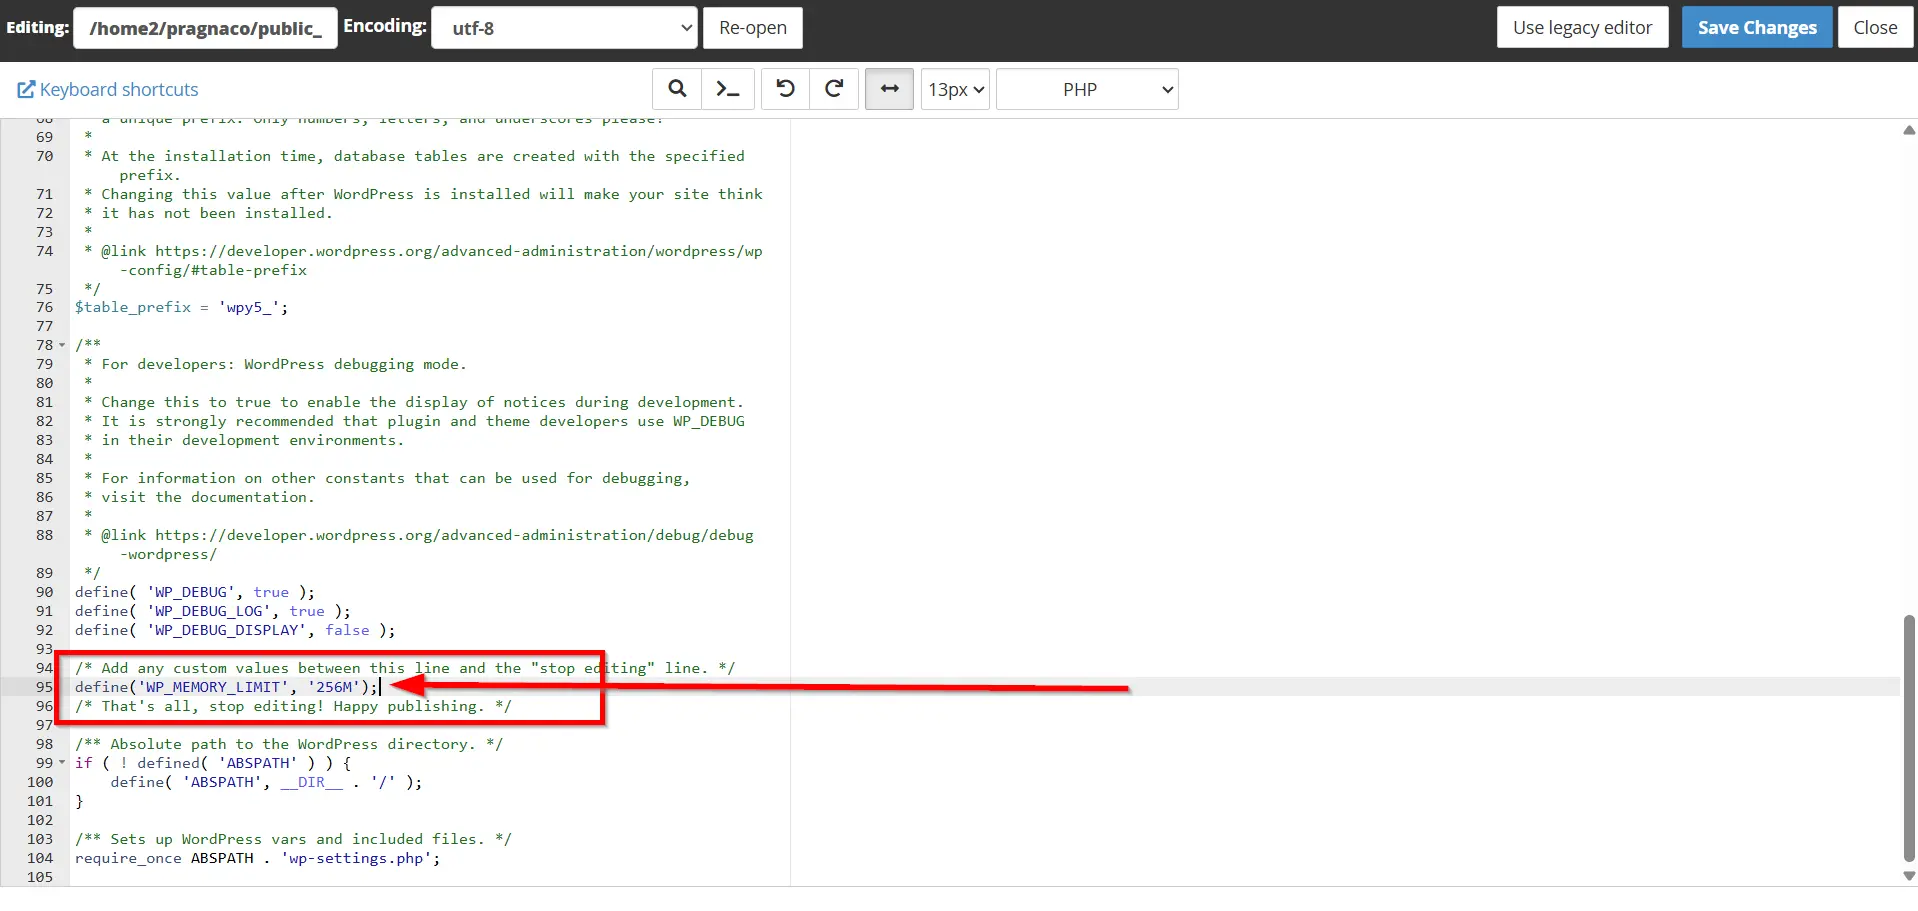
Step 5: Add the WordPress Memory Limit Code
Scroll down until you find the following line:
/* That's all, stop editing! Happy blogging. */
Immediately above this line, add:
define('WP_MEMORY_LIMIT', '256M');
The section should now appear similar to:
define('WP_MEMORY_LIMIT', '256M');

/* That's all, stop editing! Happy blogging. */
You can replace 256M with another value if your hosting plan supports it.
Common values include:
- 128M
- 256M
- 512M
For most WordPress websites, 256M provides sufficient memory.
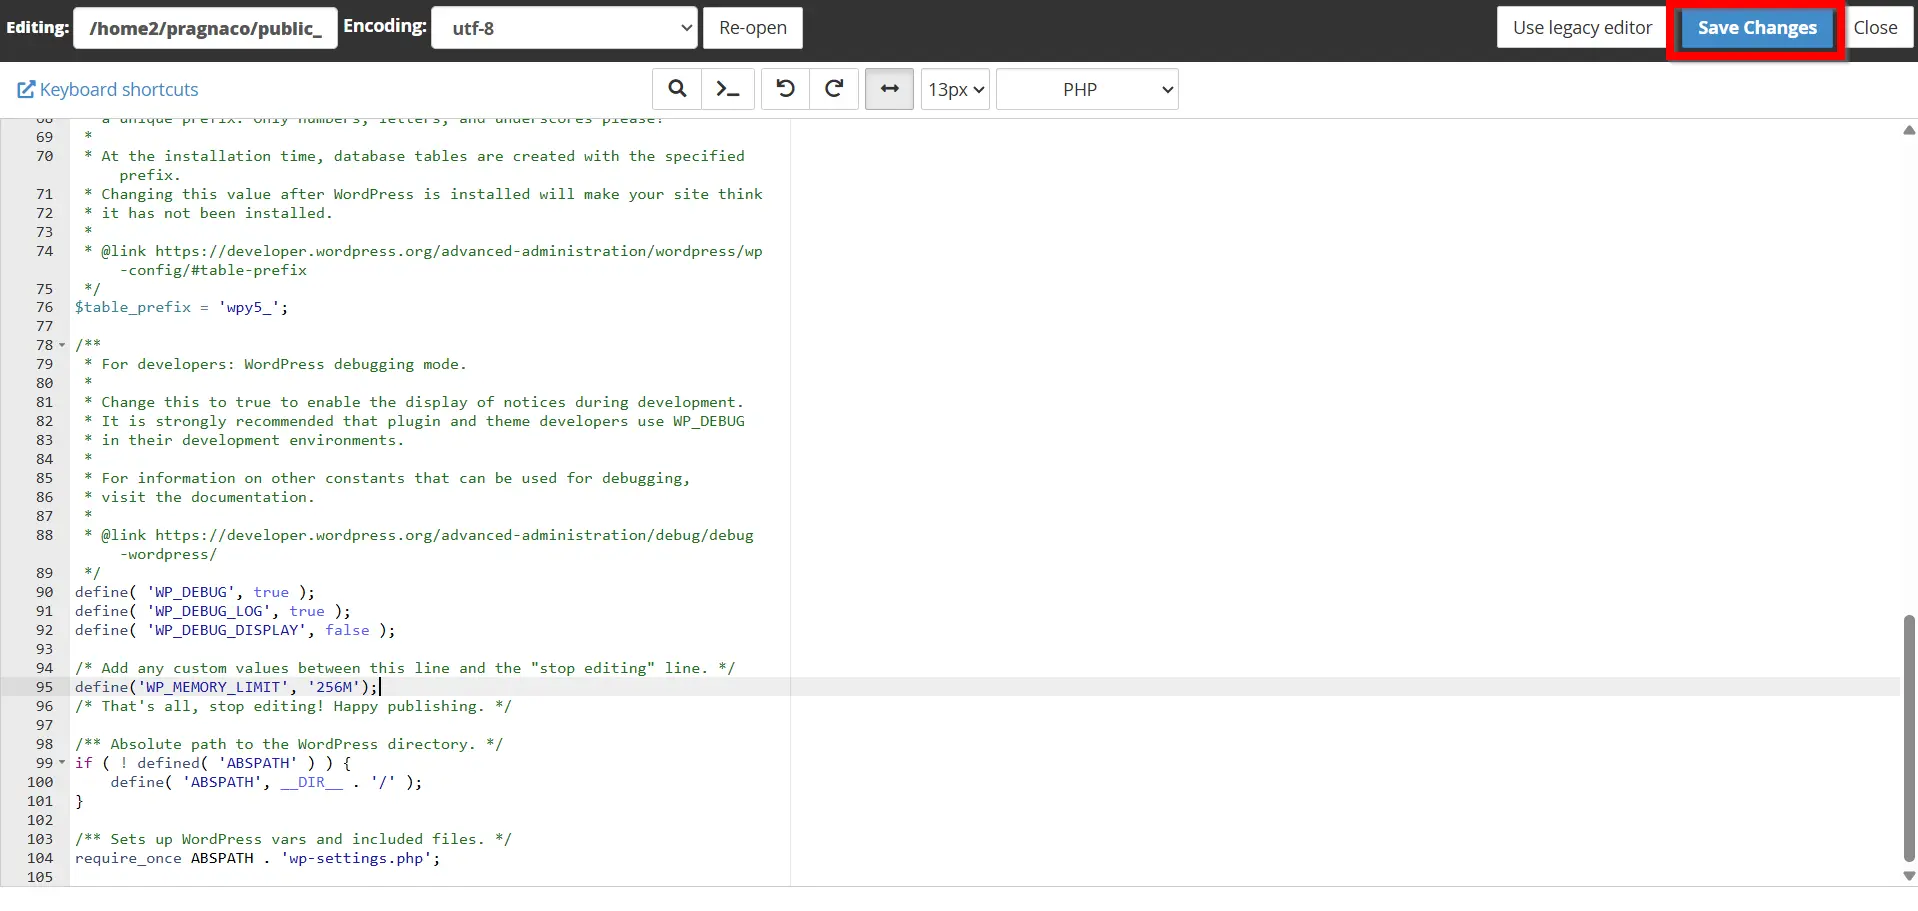
Step 6: Save Changes
After adding the code, click the Save Changes button.
A success message should appear confirming that the file has been updated.
Your WordPress memory limit has now been increased.
Verify the New Memory Limit
After saving the changes, it’s a good idea to confirm that WordPress recognizes the updated memory allocation.
You can verify the change by:
- Logging in to your WordPress Dashboard.
- Navigating to Tools → Site Health.
- Viewing the server information section.
- Checking the PHP memory limit value.
Alternatively, you can use a plugin that displays server and PHP configuration information.
What If the Memory Limit Doesn’t Change?
Sometimes the memory limit may remain unchanged even after editing wp-config.php.
This usually happens because the hosting provider has imposed server-level restrictions.
If this occurs, try the following:
- Update PHP Settings in cPanel
- Contact Hosting Support
- Upgrade Your Hosting Plan
Best Practices for Managing WordPress Memory
To keep your website running efficiently:
- Remove unused plugins and themes.
- Keep WordPress updated.
- Use lightweight plugins whenever possible.
- Optimize images before uploading.
- Clean your WordPress database regularly.
- Monitor server resource usage.
- Install only trusted plugins from reputable developers.
These practices help reduce unnecessary memory consumption and improve overall website performance.
Benefits of Updating the WordPress Memory Limit
1. Eliminates Memory Exhaustion Errors
2. Improves Website Speed
3. Supports Resource-Intensive Plugins
4. Smooth WordPress Updates
5. Better WooCommerce Performance
6. Enhanced User Experience
7. Greater Website Stability
Conclusion
Memory-related errors can be frustrating, but they are often easy to fix. Update WordPress memory limit from cPanel gives your website additional resources to handle plugins, themes, updates, and visitor traffic more effectively.
By editing the wp-config.php file and setting an appropriate memory allocation, you can eliminate common WordPress memory errors, improve site speed, and enhance overall stability. Whether you operate a personal blog, business website, or WooCommerce store, increasing the WordPress memory limit is a simple yet valuable optimization that helps ensure a smooth and reliable user experience.
Originally published on WebyStrata.com Blog.
Related Articles