cPanel
How to Change the WordPress Auto-Save Interval
How to Change the WordPress Auto-Save Interval WordPress includes an auto-save feature that automatically saves your post drafts while you are writing or editing content. This feature is designed to protect your work from…
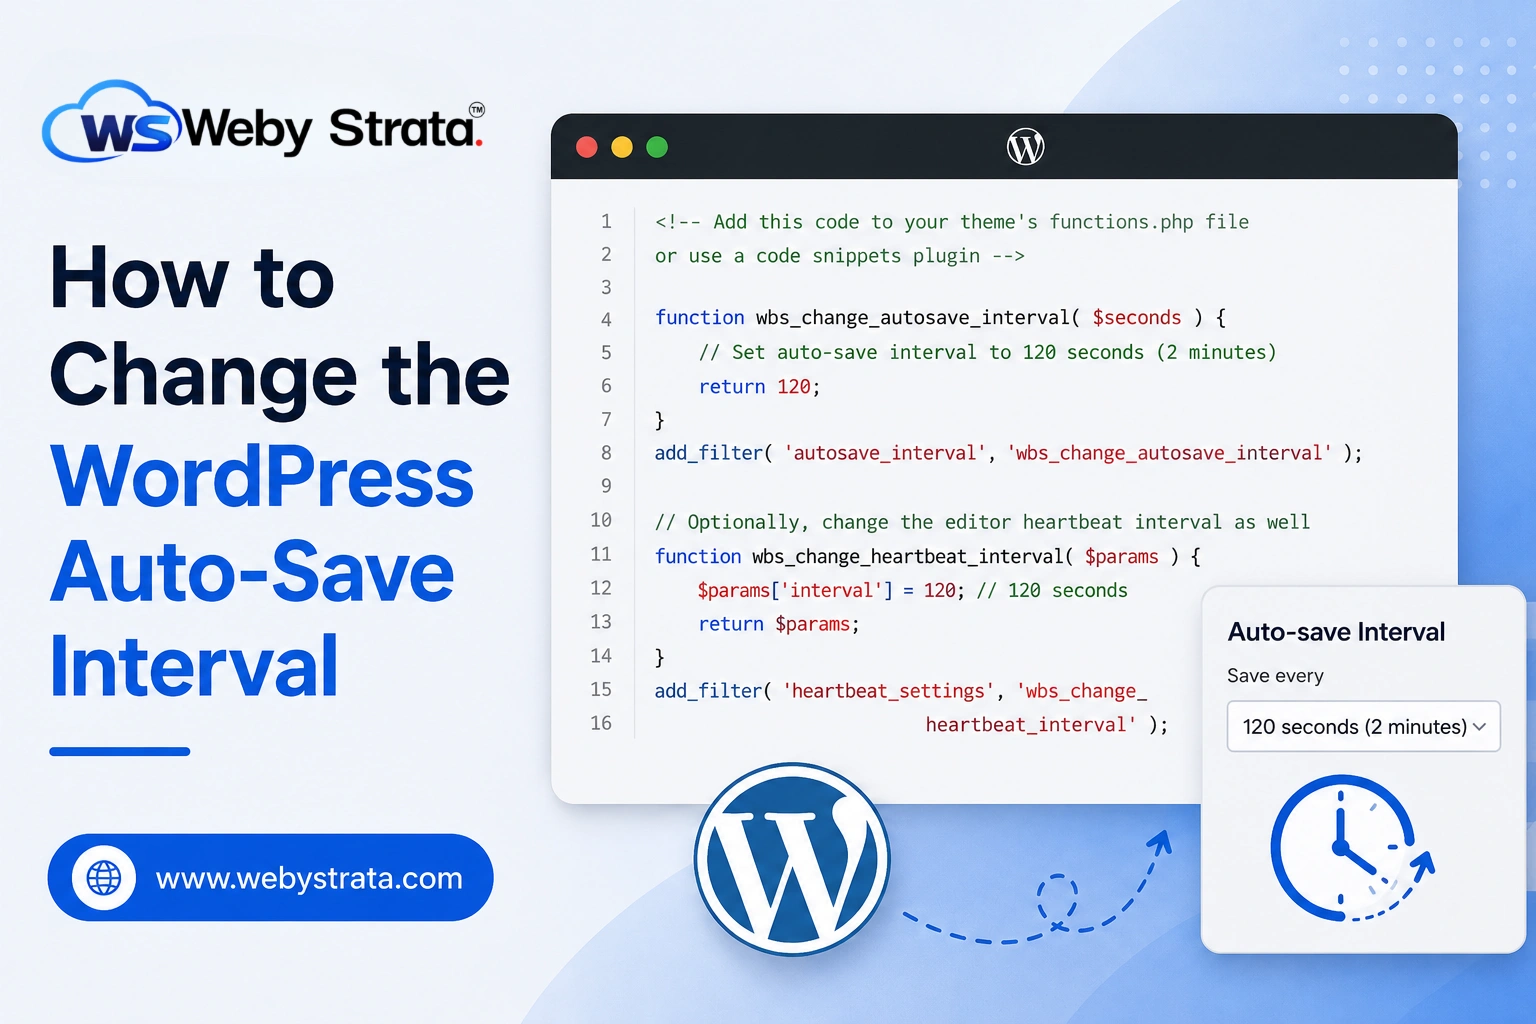
How to Change the WordPress Auto-Save Interval
WordPress includes an auto-save feature that automatically saves your post drafts while you are writing or editing content. This feature is designed to protect your work from accidental browser crashes, power outages, internet interruptions, or other unexpected issues that could cause data loss.
By default, WordPress saves a draft of your content every 60 seconds. While this setting works well for most websites, there are situations where you may want to adjust the auto-save interval. For example, if your hosting environment is limited or your internet connection is slow, frequent auto-saving may affect performance. On the other hand, content-heavy websites may prefer more frequent saves to reduce the risk of losing edits.
In this guide, you’ll learn what the WordPress auto-save feature does, why you might want to modify it, and how to safely change the auto-save interval using cPanel.
What is the WordPress Auto-Save Feature?
The WordPress auto-save feature automatically stores a copy of your post or page while you’re editing it. This helps prevent data loss if:
- Your browser unexpectedly closes.
- Your internet connection drops.
- Your computer crashes or restarts.
- You accidentally navigate away from the page.
- A plugin or theme conflict causes the editor to freeze.
Every auto-save creates a temporary revision that WordPress can restore if needed. By default, WordPress performs this action every 60 seconds.
Before You Begin
Before editing any WordPress core configuration files, it is recommended to:
- Create a full website backup.
- Backup the wp-config.php file.
- Verify that you have access to cPanel or your hosting file manager.
This allows you to restore your website quickly if any mistakes are made during editing.
How to Change the WordPress Auto-Save Interval
Follow the steps below to modify the auto-save frequency.
Step 1: Login to cPanel from WebyStrata Client Area
First, visit the WebyStrata website and log in to your client area account using your registered email address and password.
official Website www.webystrata.com
After logging in:
- Go to Services
- Click on My Services
- Select your active hosting service
- Click on Login to cPanel
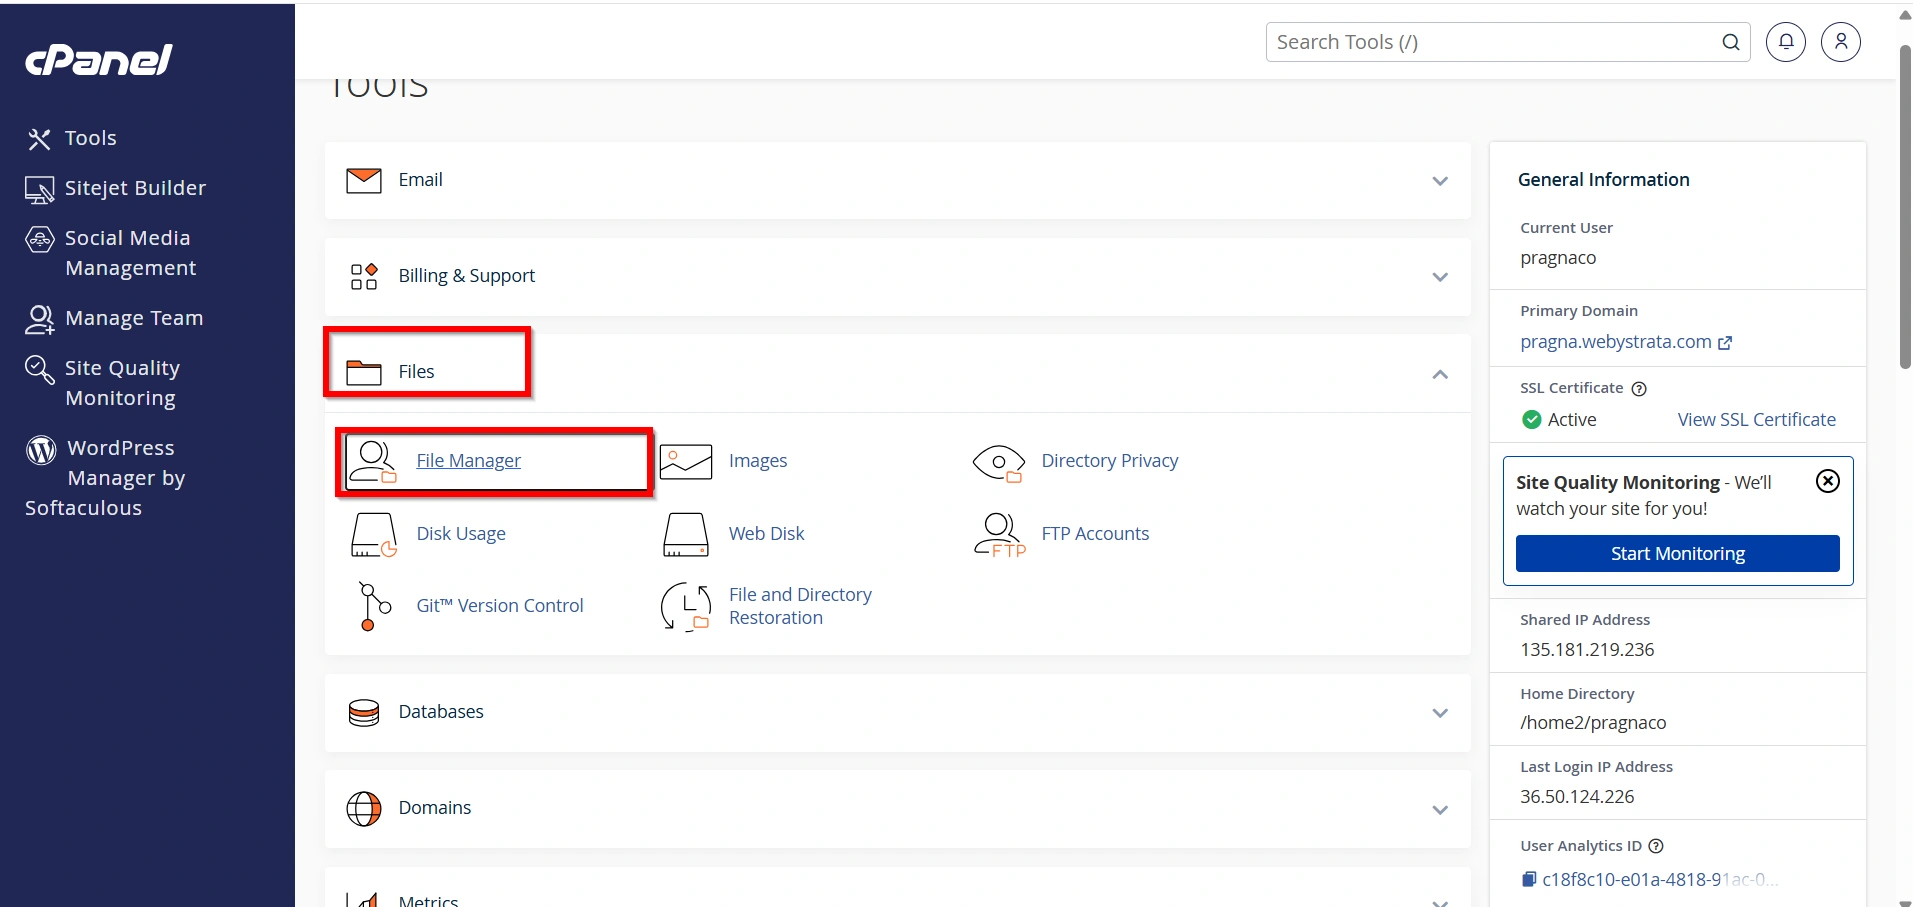
Step 2: Open File Manager
From the cPanel dashboard:
- Locate the Files section.
- Click File Manager.
The File Manager allows you to browse and edit your website files directly from cPanel.
Step 3: Navigate to Your WordPress Installation
Open the folder where WordPress is installed.
Most websites are installed in:
public_html
If WordPress is installed in a subdirectory, navigate to that specific folder instead.
Examples:
public_html/blog
or
public_html/wordpress
Step 4: Edit the wp-config.php File
Locate the file:
wp-config.php
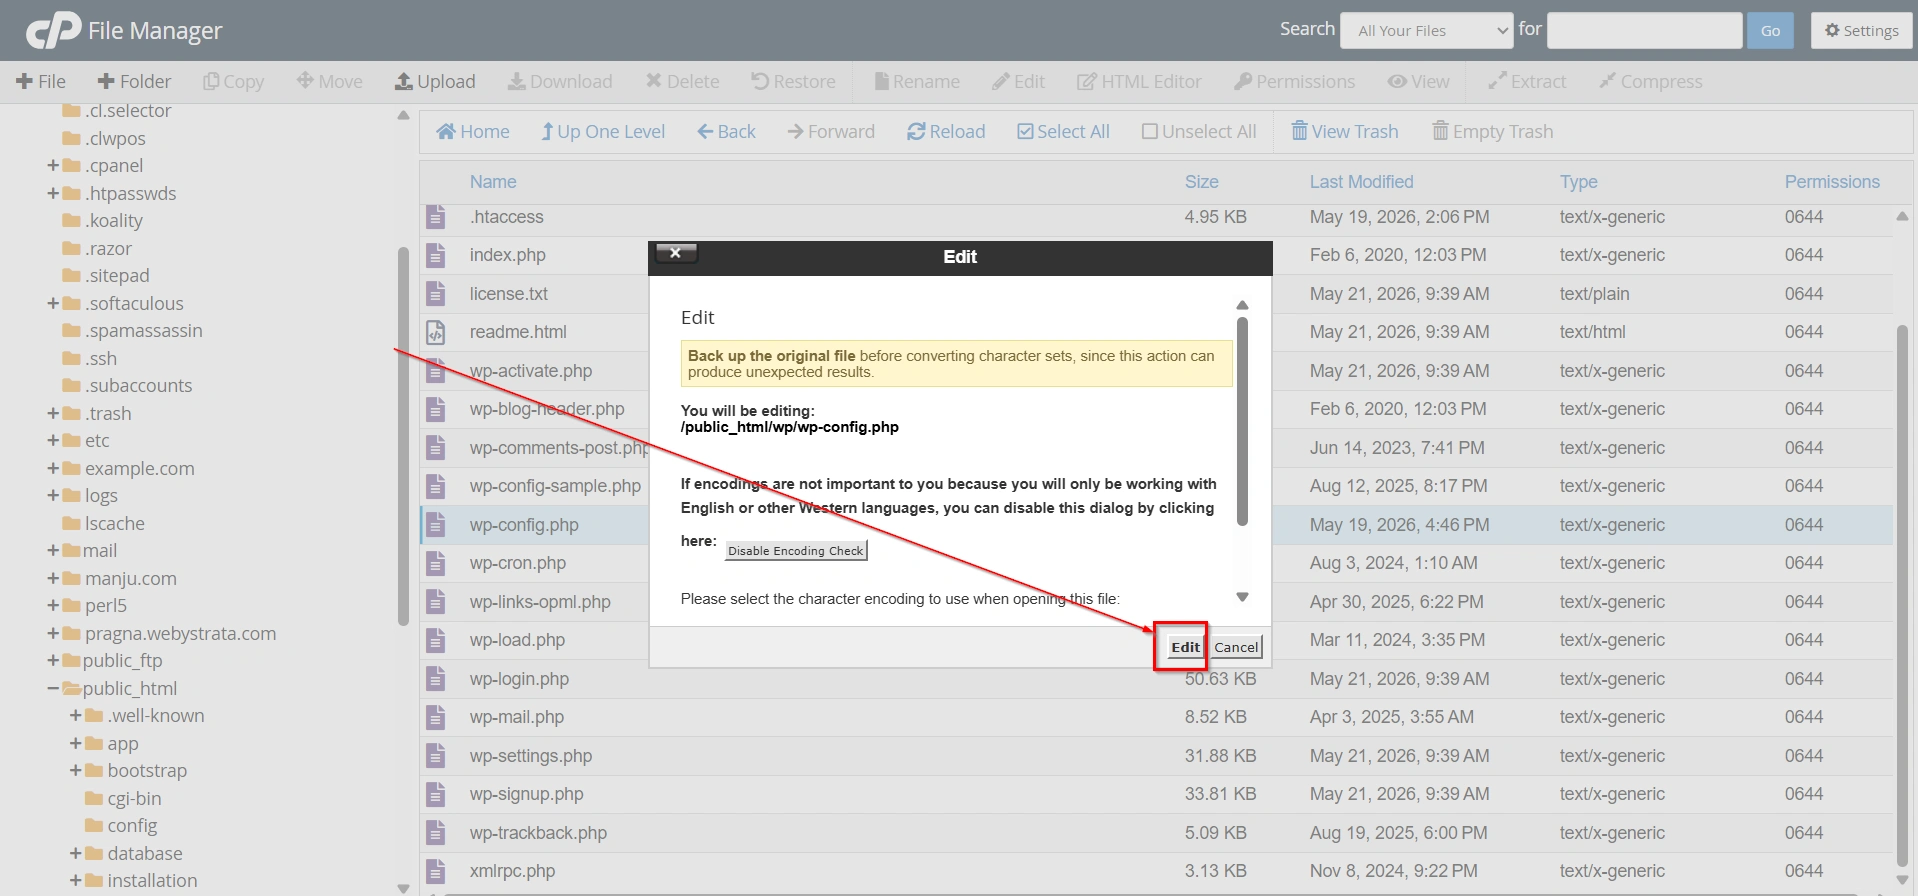
- Right-click the file and select Edit.
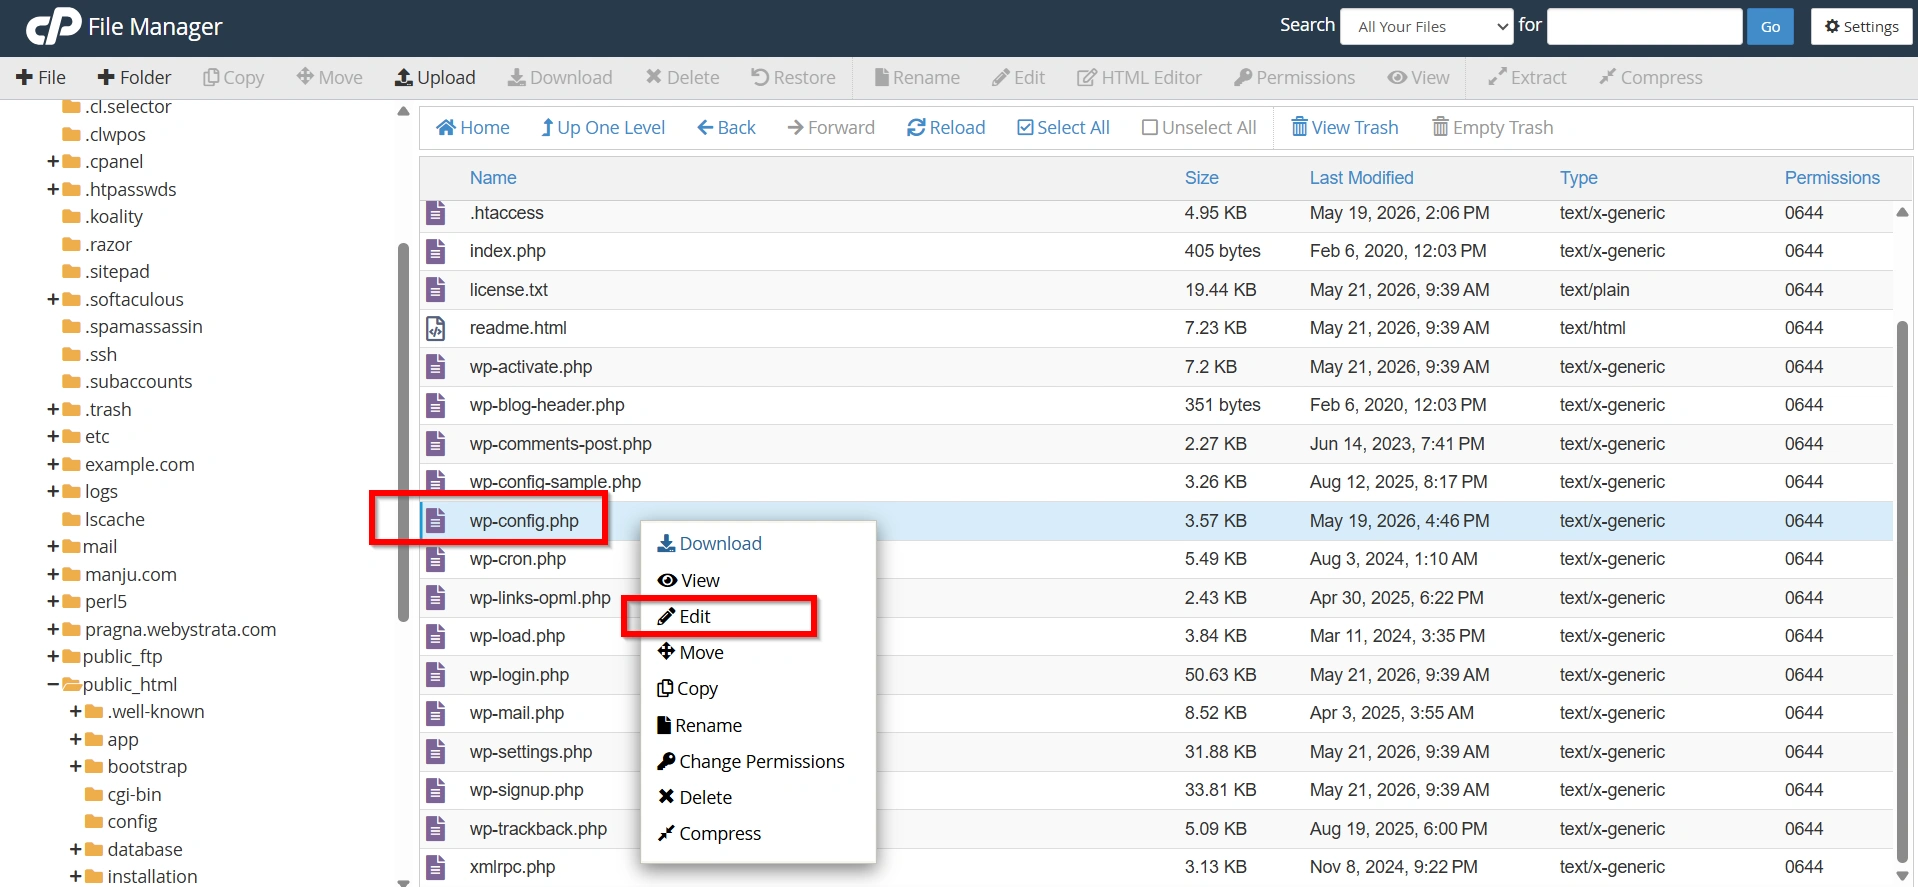
- A confirmation window may appear. Click Edit again to proceed.
Step 5: Add the Auto-Save Configuration
Insert the following line into the wp-config.php file:
define('AUTOSAVE_INTERVAL', 180);
The number represents the auto-save interval in seconds.
Examples:
| Interval | Setting |
|---|---|
| 30 Seconds | define('AUTOSAVE_INTERVAL', 30); |
| 60 Seconds | define('AUTOSAVE_INTERVAL', 60); |
| 120 Seconds | define('AUTOSAVE_INTERVAL', 120); |
| 180 Seconds | define('AUTOSAVE_INTERVAL', 180); |
| 300 Seconds | define('AUTOSAVE_INTERVAL', 300); |
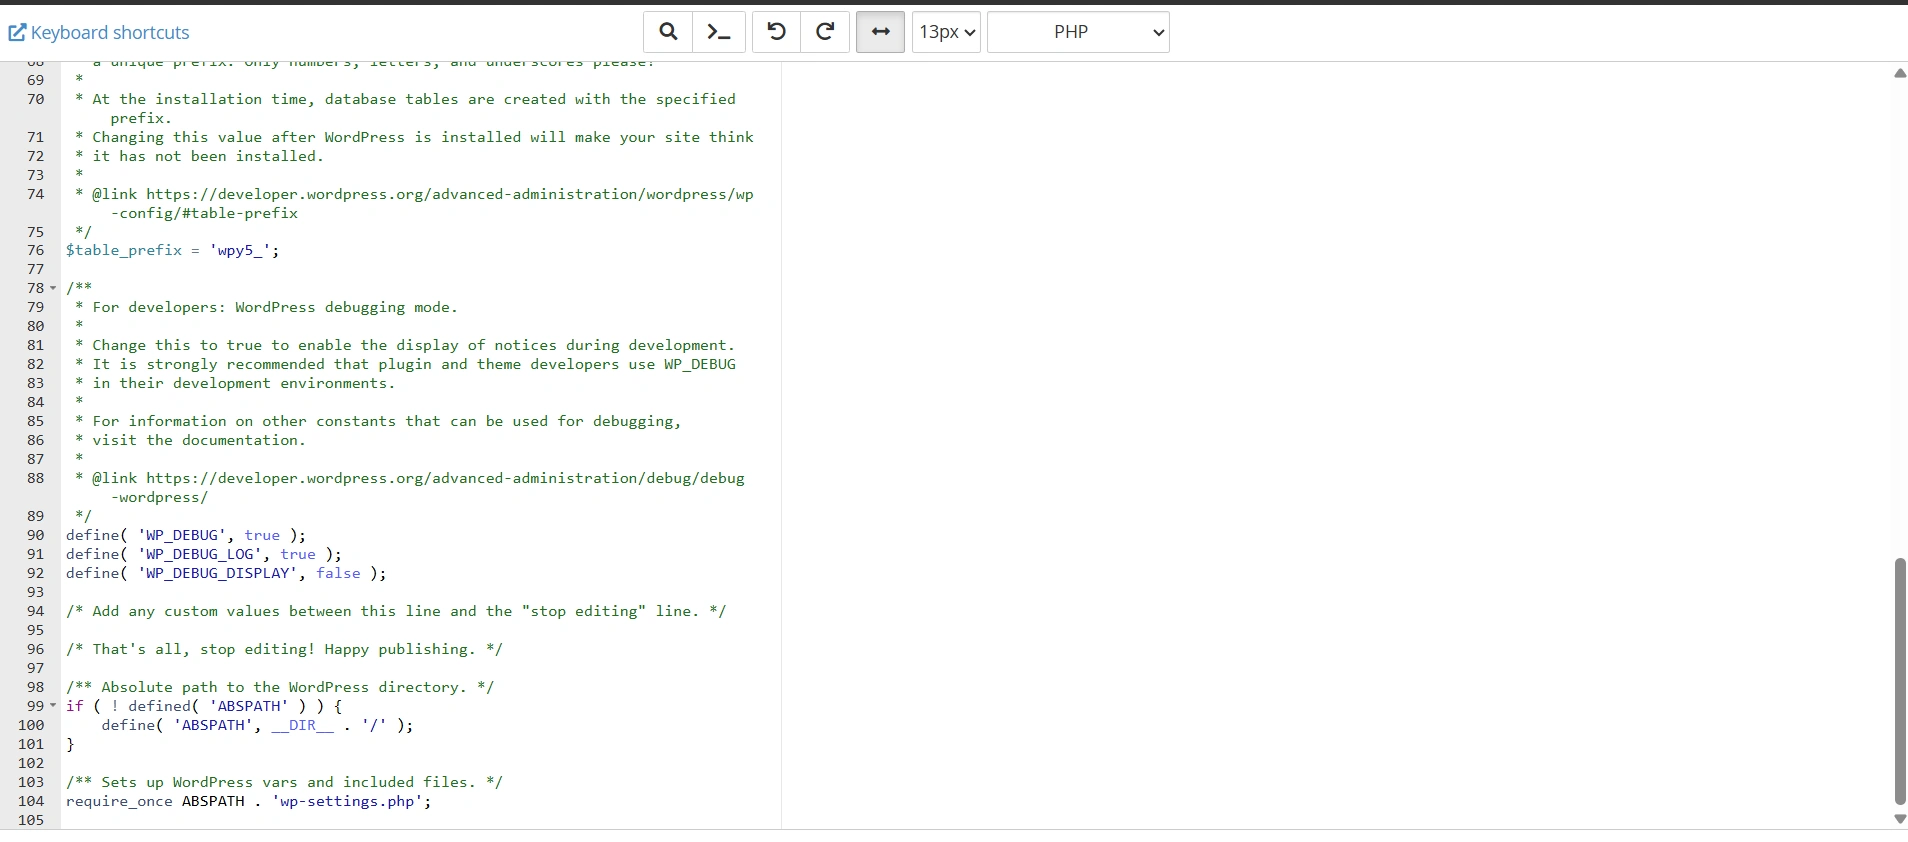
Step 6: Place the Code in the Correct Location
The auto-save definition must be placed before the following line:
require_once(ABSPATH . 'wp-settings.php');
Example:
define('AUTOSAVE_INTERVAL', 180);

require_once(ABSPATH . 'wp-settings.php');
If the auto-save setting is placed below this line, WordPress will ignore the configuration.
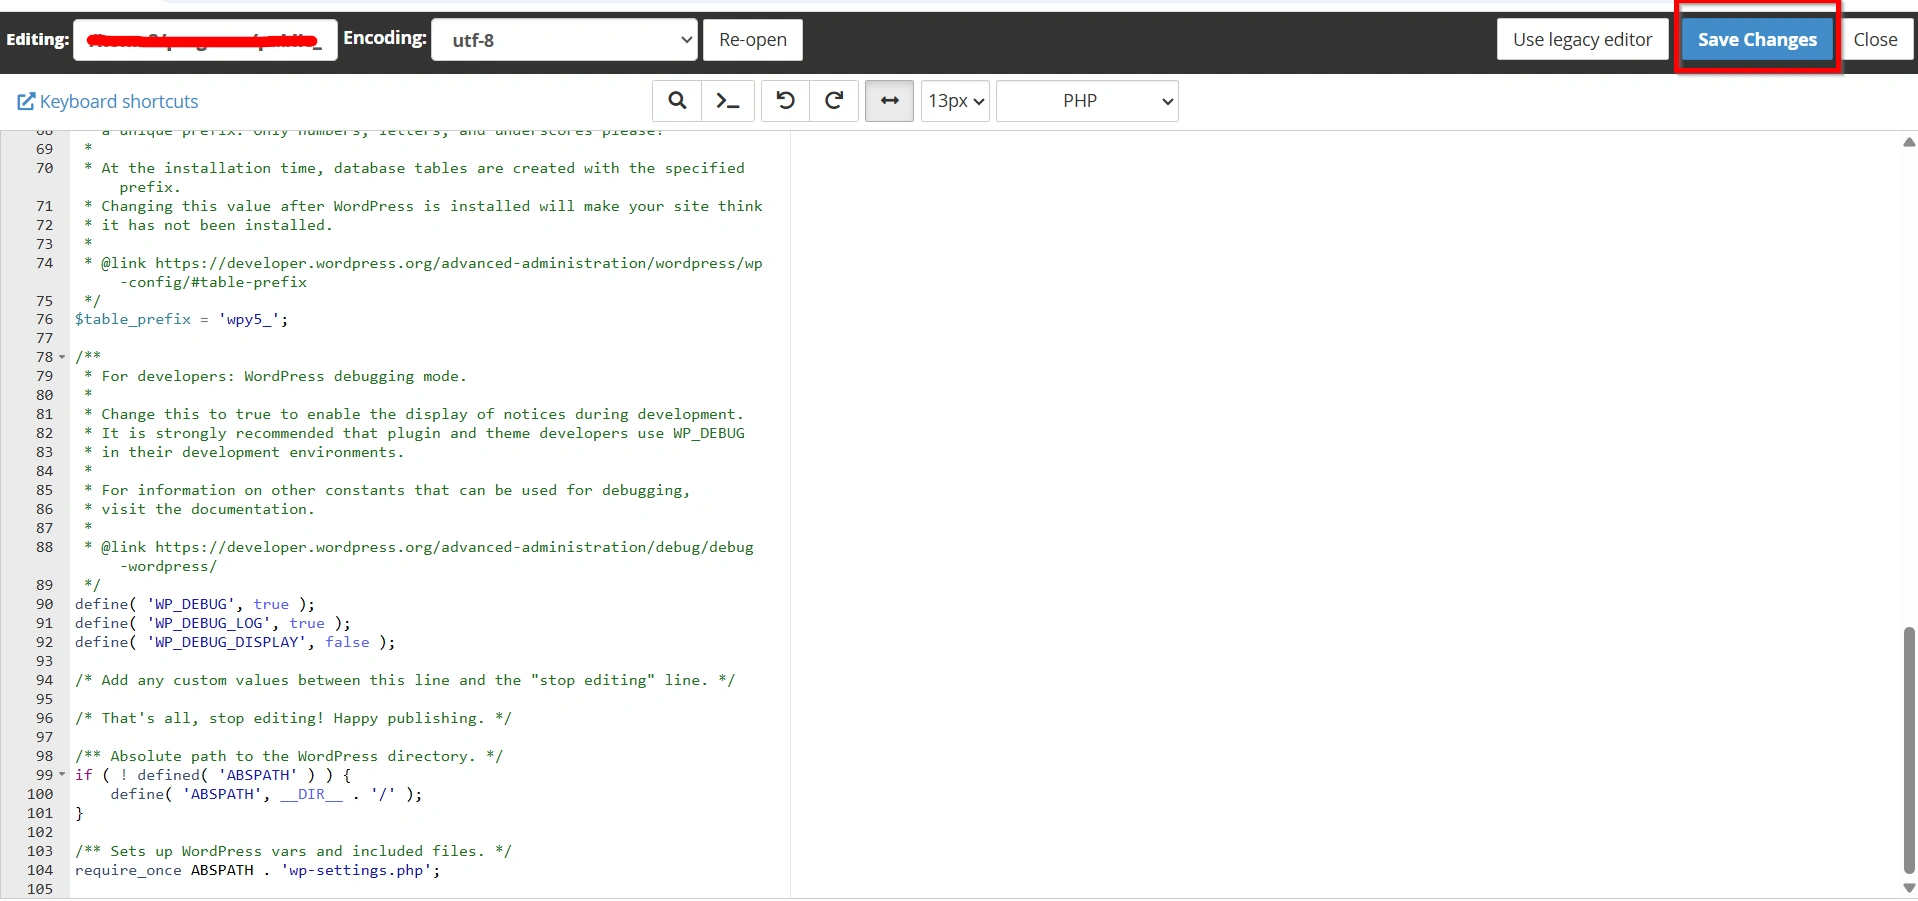
Step 7: Save Your Changes
After adding the code:
- Click Save Changes.
- Close the editor.
- Log in to your WordPress dashboard.
The new auto-save interval will now be active.
Why Change the Auto-Save Interval?
Although the default setting is suitable for many users, there are several reasons to customize it.
Increase the Auto-Save Interval
You may want to increase the interval if:
- You experience editor lag while writing.
- Your website is hosted on a low-resource server.
- You have a slow internet connection.
- You want to reduce database activity.
For example, changing the interval from 60 seconds to 180 seconds means WordPress will save drafts every 3 minutes instead of every minute.
Decrease the Auto-Save Interval
You may want to decrease the interval if:
- You regularly write long articles.
- Multiple authors contribute content.
- You want additional protection against data loss.
- You frequently edit important pages.
For example, setting the interval to 30 seconds ensures drafts are saved twice as often.
Benefits of Adjusting the Auto-Save Interval
Changing the WordPress auto-save interval offers several advantages:
- Improves editor performance on slower hosting environments.
- Reduces unnecessary database operations.
- Minimizes browser lag while editing.
- Provides better protection against accidental data loss.
- Allows customization based on your workflow and writing habits.
Conclusion
The WordPress auto-save feature is an essential tool that helps protect your content while editing posts and pages. However, the default 60-second interval may not be ideal for every website.
By making a simple change to the wp-config.php file, you can increase or decrease the auto-save frequency to better suit your hosting environment and content creation workflow. Whether your goal is improved performance or enhanced data protection, adjusting the auto-save interval is a quick and effective WordPress optimization.
Always remember to create a backup before modifying configuration files and test your changes after saving them.
Originally published on WebyStrata.com Blog.
Related Articles