Latest Updates
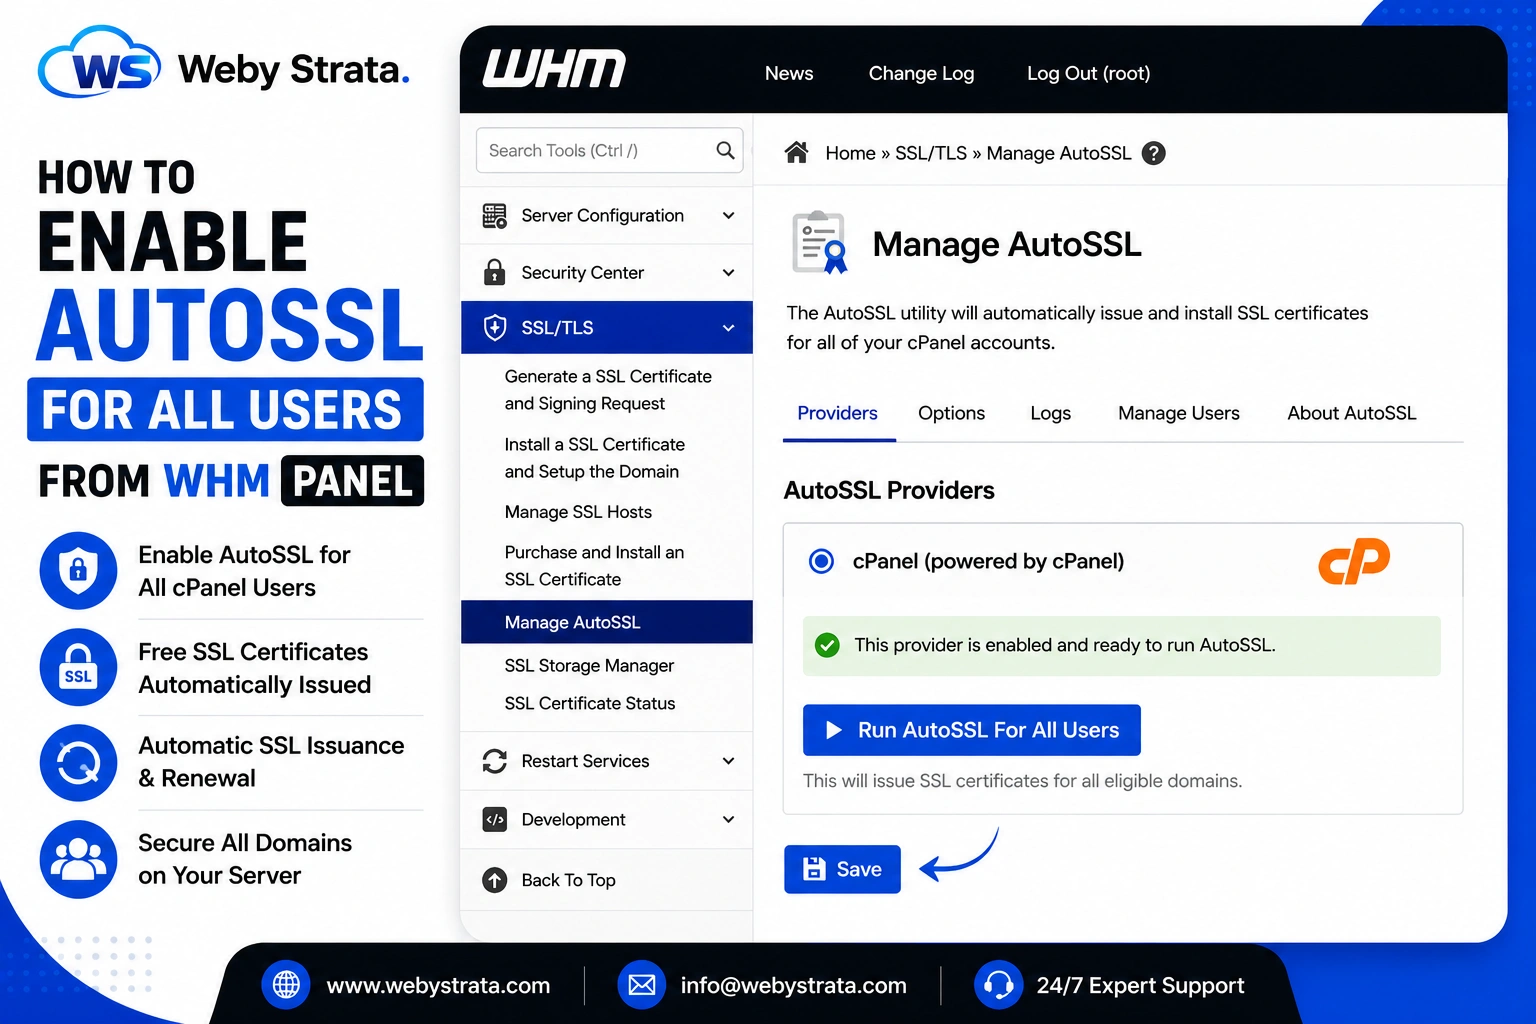
How to Enable AutoSSL for All Users from WHM Panel
How to Enable AutoSSL for All Users from WHM Panel AutoSSL helps server administrators automatically issue and renew free SSL certificates for all cPanel accounts hosted on a server. Step 1: Log in to…
How to Enable AutoSSL for All Users from WHM Panel
AutoSSL helps server administrators automatically issue and renew free SSL certificates for all cPanel accounts hosted on a server.
Step 1: Log in to WHM
Log in to your WHM account using root credentials.
Step 2: Open SSL/TLS
From the left-side navigation menu, go to: SSL/TLS

Step 3: Click on Manage AutoSSL
Under the SSL/TLS section, click:
Manage AutoSSL
The AutoSSL management interface will open.

Step 4: Navigate to AutoSSL Providers
Scroll to the:
AutoSSL Providers
section.
Step 5: Select cPanel
Choose: cPanel as your AutoSSL provider.
Step 6: Run AutoSSL for All Users
After selecting the provider, the following option will appear:
Run AutoSSL For All Users
Click this button to start issuing SSL certificates for all eligible domains and accounts on the server.
A success message will appear after the process starts.
Step 7: Save the Configuration
Click: Save

to apply the AutoSSL configuration.
Conclusion
Enabling AutoSSL in WHM allows server administrators to automatically provide free SSL certificates to all cPanel users. This improves website security, enables HTTPS, protects visitor data, and ensures SSL certificates are renewed automatically without manual intervention.
Originally published on WebyStrata.com Blog.
Related Articles